

What is OAuth2?
OAuth2 defines a framework as a means of authorization to access protected resources using the HTTP protocol.
It is an open-standard authorization protocol or framework that provides applications the ability for “secure designated access”. A practical example would be the ability to download contacts from Gmail, into an application or alternatively, upload contacts from the application to Gmail – all done without having to leave the application. It was designed as an authorization tool rather than an authentication tool.
OAuth doesn’t share password data but instead uses authorization tokens to prove an identity between consumers and service providers. As a result, your password is not known by anyone other than authorization server (e.g. Google). OAuth is an authorization protocol that allows you to approve one application interacting with another on your behalf without giving away your password.
OAuth2 integration is available through the API’s of platforms such as Salesforce, Eloqua & Marketo.
OAuth2 defines different methods of how an application may interact with an authorization server to gain authorization. These are often referred to as a ‘grant type’. Examples of grant types are:
- Authorization Code
- Authorization Code (+PKCE)
- Client Credentials
- Implicit (removed in oauth2.1)
- Resource Owner Password Credentials (removed in oauth2.1)
- etc
For this example, we will concentrate on the ‘Authorization Code’ grant type.
Authorization Code Grant Workflow
In general, ‘Authorization Code Grant’ authentication follow a pattern which we list here, using kdb+ as the application:
- The user accesses the application (who owns the resources required)
- The application (kdb+) replies with a http redirect to the clients browser to make it perform a http request to the authorize endpoint (which includes a set of params such as an authorization request,scope,callback url,etc). The application (kdb+) is not involved again until step 5 (i.e. kdb+ doesn’t see the user’s password, nor prompt for it directly). Its important to note that part of the params passed to the authorization server was the ‘callback url’ which will be used later by the auth server to involve kdb+ again.
- The authorization server replies to the client with a prompt for consent (usually involving authentication e.g. user/password).
- The user provides consent back to the authorization server
- The authorization server replies with a http redirect to the clients browser to go to the callback url which it recorded previously, along with various parameters it has set. The redirect will therefore make the clients browser make a http request to kdb+ passing params such as an authentication code.
- The application (kdb+) then calls the token endpoint passing the authentication code (can only be used once). The application no longer needs the authentication code.
- The token enpoint responds with an access token (and optionally, a refresh token).
- The application (kdb+) is then free to call the resource servers using the access token (until expired/revoked)
Google Example
For this example, we will use the OAuth2 features from Google ( https://developers.google.com/identity/protocols/OAuth2 )
This example will demonstrate a user accessing kdb+ using http with their browser. The user with be prompted to enter their gmail address. kdb+ will then initiate the workflow to authorize access to gain an access token from Google & present to the user their registered profile picture.
Prerequisites
- Download code from https://github.com/kxcontrib/oauth2
- Configure kdb+ instance to perform TLS/SSL requests (see https://code.kx.com/q/kb/ssl/). You can check by typing the following within your kdb+ instance to ensure no error result.
q)Q.hg`$":https://www.google.com"Configure a project within Google Cloud API console (https://console.cloud.google.com/). Reference material https://developers.google.com/identity/protocols/OAuth2
-
- Within that project, create an ‘OAuth 2.0 Client ID’
- We will use a callback endpoint, set to our kdb+ http server address (edit your client id to have an ‘Authorised redirect URI’ set to http://localhost:1234/
- After creating a client id, download the ‘Oauth Client Credentials’ (can be found beside your newly created id on the ‘Credentials’ screen). This should download a .json file
- Rename the downloaded json file as google_client.json (this should be pre-populated with client_id, client_secret, etc) & place in your kdb+ running directory.
- This example will use port 1234 on your machine (please change oauth.q & your callback uri if you wish to use a different port)
- A gmail.com email address for which you are registered
OAuth2 can be used from within q, using the native q functions,
- .Q.hp (http post)
- .Q.hg (http get)
- .z.ph. (http handle)
- .j.k
For the purpose of this article, we’ve overwritten the call to .z.ph. However, it could easily be manipulated as a hook into the standard definition of .z.ph.
Notes
- As per the code.kx.com wiki. these http calls support using proxy settling (https://code.kx.com/q/ref/dotq/#hg-http-get)
- Some of the functions above have been modified to illustrate the token exchange.
Schemas used in this example are:
- .oauth2.domains – maps email domains to oauth2 providers (of which there is only Google for this example)
- .oauth2.provider – records all endpoint urls and client information (where kdb+ is the client) required to contact Google
- .oauth2.state – current state of the authenticated user (including tokens received)
Running the Example
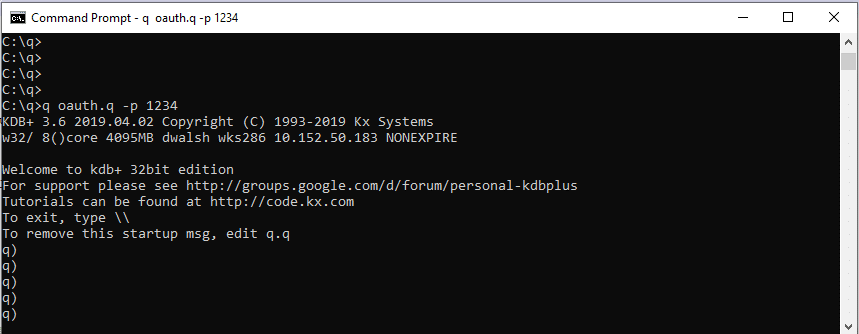
To execute, run the oauth.q script from your local machine & open your browser to http://localhost:1234.
Note: If not running kdb+ from your localhost, edit oauth.q to change .oauth2.redirect_url to the machine running kdb+ (and also check your ‘Authorised redirect URI’ within the Google console that it allows this url).

Upon entering an email and hitting ‘Login’ a call is made to .z.ph, which recognizes an email address is present, parses out the email, and identifies the provider the email is configured for, in this case Google.
q).oauth2.domains
domain| provider
------| --------
kx.com| google
The user is then directed to a Google authorization page where they can provide their consent. At this point, we record the users attempt to access Google.
A callback is included in the URL which the user is routed to. Google will use this URL as the callback to redirect the user once consent has been granted.
q).oauth2.state
state                                         | username      created                       provider access_token refresh_token ok
----------------------------------------------| ----------------------------------------------------------------------------------
milgliegigfbageikaodhbeibafclbiguser@gmail.com| user@gmail.com 2019.05.27D15:12:16.004840000 google                              0
// redirect url included in the fields passed to Google
response_type| `code
redirect_uri | "http://localhost:1234/"
scope        | "openid email profile"
access_type  | `offline
prompt       | `consent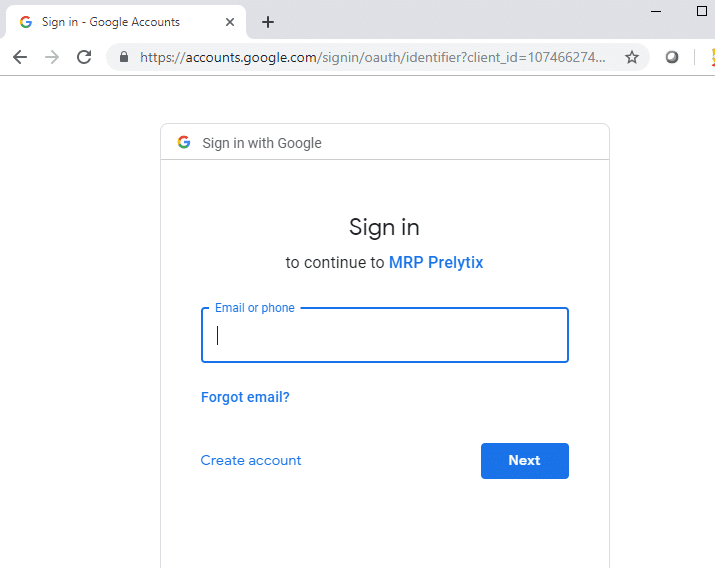
Within this http call to kdb+ will be an Authorization Code. The application can exchange this for an Access & Refresh token, see .oauth2.getTokens.
This exchange is made using an HTTP Post call (.Q.hp). Some of the parameters used in this exchange are below. Not displayed is the client_id & client_secret.
The code field contains the Grant Token. The naming convention follows the specifications of the Google REST API.
https://developers.google.com/identity/protocols/OAuth2WebServer
q) // the code field is the Grant Token mentioned above.
q)3#"&" vs postdata
"grant_type=authorization_code"
"redirect_uri=http%3a%2f%2flocalhost%3a1234%2f"
"code=4%2fVwFxFzln8T1y1Z7ynuNslTVZqih_CJ9HlwmnKs6JFeB9OmupIijDAmUYk91hO-UGj23ie8hL7HucJW_dbkAkCbI"

q).Q.hp["https://oauth2.googleapis.com/token";`GET; postdata]
The result back is the Access & Refresh tokens which we store locally to reuse.
q).j.k  .Q.hp["https://oauth2.googleapis.com/token";`GET; postdata]
access_token | "..redacted.."
expires_in   | 3600f
refresh_token| "....redacted...."
scope        | "https://www.googleapis.com/auth/userinfo.profile https://www.googleapis.com/auth/userinfo.email openid"
token_type   | "Bearer"
q).oauth2.state
state                                           username      created                       provider access_token   refresh_token    ok
---------------------------------------------------------------------------------------------------------------------------------------
"milgliegigfbageikaodhbeibafclbiguser@gmail.com" user@gmail.com 2019.05.27D15:43:32.490926000 google   "..redacted.." "...redacted..." 1
In order to illustrate the complete workflow, we have configured .z.ph to immediately request the Google profile, upon receipt of an Access Token.
Obtaining the user profile is done manually by calling a modified version of .Q.hmb, .oauth2.hmb. The reason for using this modified version is that .Q.hmb is currently limited to using a Basic token, and cannot use a Bearer token
This uses the Access Token received from Google.
q)hsym`$.oauth2.provider[`google;`userinfo_endpoint]
`:https://openidconnect.googleapis.com/v1/userinfo
q).j.k .oauth2.hmb[hsym`$.oauth2.provider[`google;`userinfo_endpoint];`GET; .oauth2.getAccessToken`$"user@gmail.com"]
name          | "Daniel Walsh"
given_name    | "Daniel"
family_name   | "Walsh"
picture       | "https://lh5.googleusercontent.com/-oefx0ydD3tM/AAAAAAAAAAI/AAAAAAAAAmU/nDHBOu6Vpv8/photo.jpg"
email         | "user@gmail.com"
email_verified| 1b
locale        | "en"
hd            | "kx.com"
OAuth2 Scope
Further Discussion Topics
Token Refresh
The expiry time of an access token is provided when the access token is generated (and recorded in .oauth.state). If requiring an access token beyond this expiry time, a new access token can be generated using the refresh token (the refresh token has a longer expiry). An example of generating a new access token is provided via .oauth.refresh).
Server to Server
When there is no user present e.g. resources belong to the kdb+ application rather than an individual user, you can use oauth grant flow such as the ‘client credentials’ grant type rather than ‘authorization code’. This uses a different set of calls & parameter values. When performing this action with Google, reference https://developers.google.com/identity/protocols/oauth2/service-account
Revoking a Token
Google provides an endpoint which can be used to revoke an access/refresh token when it is no longer required. This has not been demonstrated as part of this example.
Google Scope
The different resources that can be retrieved using OAuth2 will be controlled by those in ‘scope’ of the Google account.
In this example, we have limited the access for the user to their Google profile. However, this scope could be extended to allow for access to email, contact, calenders etc
The full list of scopes on Google can be viewed at the link below
https://developers.google.com/identity/protocols/googlescopes
Note: This blog, posted on June 29th, 2023, is an update to the original posting on June 12th, 2019, to capture interim developments.